Tuesday, May 27, 2014

Makeup Pictorial: Vibrant Green, Blue, and Purple Eyes

Hello!

Today's pictorial is going to be a fun one. I have been dying to work with more vibrant colors, and now is the perfect time to do so. Summer is here and it's time to get creative!

Let's get started! :)

First, prime your lids and lay down a white eyeshadow base. I am using NYX Jumbo Eye Pencil in Milk:

 Then blend the base with your finger:
 Next, take a chartreuse (yellow-ish green) shadow and apply it to the inner half of your eyelid. I am using this color from my BH Cosmetics 120 Palette 3rd Edition and a Real Techniques Shading brush:

 Then, apply a blue eyeshadow to the outer half of your eyelid:

 Next, take a larger brush, like this Real Techniques Domed Shadow brush and a royal purple shadow and run it along your crease:

 Then blend everything together with a large fluffy brush. I am using the Sigma E40 brush:
 Then, apply your eyeliner as desired. I am going for my usual winged liner with the help of NYX Collection Noir liquid eyeliner:
 Now you can totally leave the eye look off right there and be done, but I wanted to kick it up a notch, so I applied that same white eye pencil to my bottom lash line:
 Then I went over it with that same purple color and a pencil brush. This one is from Crown Brush:
 Then I added some depth with a black eyeshadow and a flat brush:
 And then I blended it out with that same pencil brush:
 Now that the shadow is done, apply a coat or two of mascara. I am using L'Oreal Telescopic Carbon Black mascara:
 You can leave the look just like that, but if you know me, you know I like my false lashes :)
I am using Ardell #105 lashes and Revlon brush-on adhesive:


 And VOILA!!! All done!


This is such a fun eye makeup look. I realize that it's not for every day wear, but this would be something fun to try out if you are going out with your girlfriends. I love working with bolder colors and I think that makeup should be fun and different :)

Want to see more pictorials like this? Sound off in the comments!
Be sure to follow the NEW Instagram @angelacollinsbeauty !

xoxo, Ang

Tuesday, May 20, 2014

Get Ready with Me: Full Face Pictorial!

Hello my beauties!

Today I decided to post the makeup look I wore this past Saturday. For this look, I used pigments, aka loose eyeshadows, instead of pressed ones. Why? Because they are awesome and the ones I use below are new to me.

Let's get started!

First, I applied my MAC Pro Longwear Paint Pot in Painterly:
 Next, I started my shadow application by laying down my crease shade. I used Maybelline Color Tattoo Pure Pigments Eyeshadow in Buff & Tuff and my Sigma E25 Blending Brush:

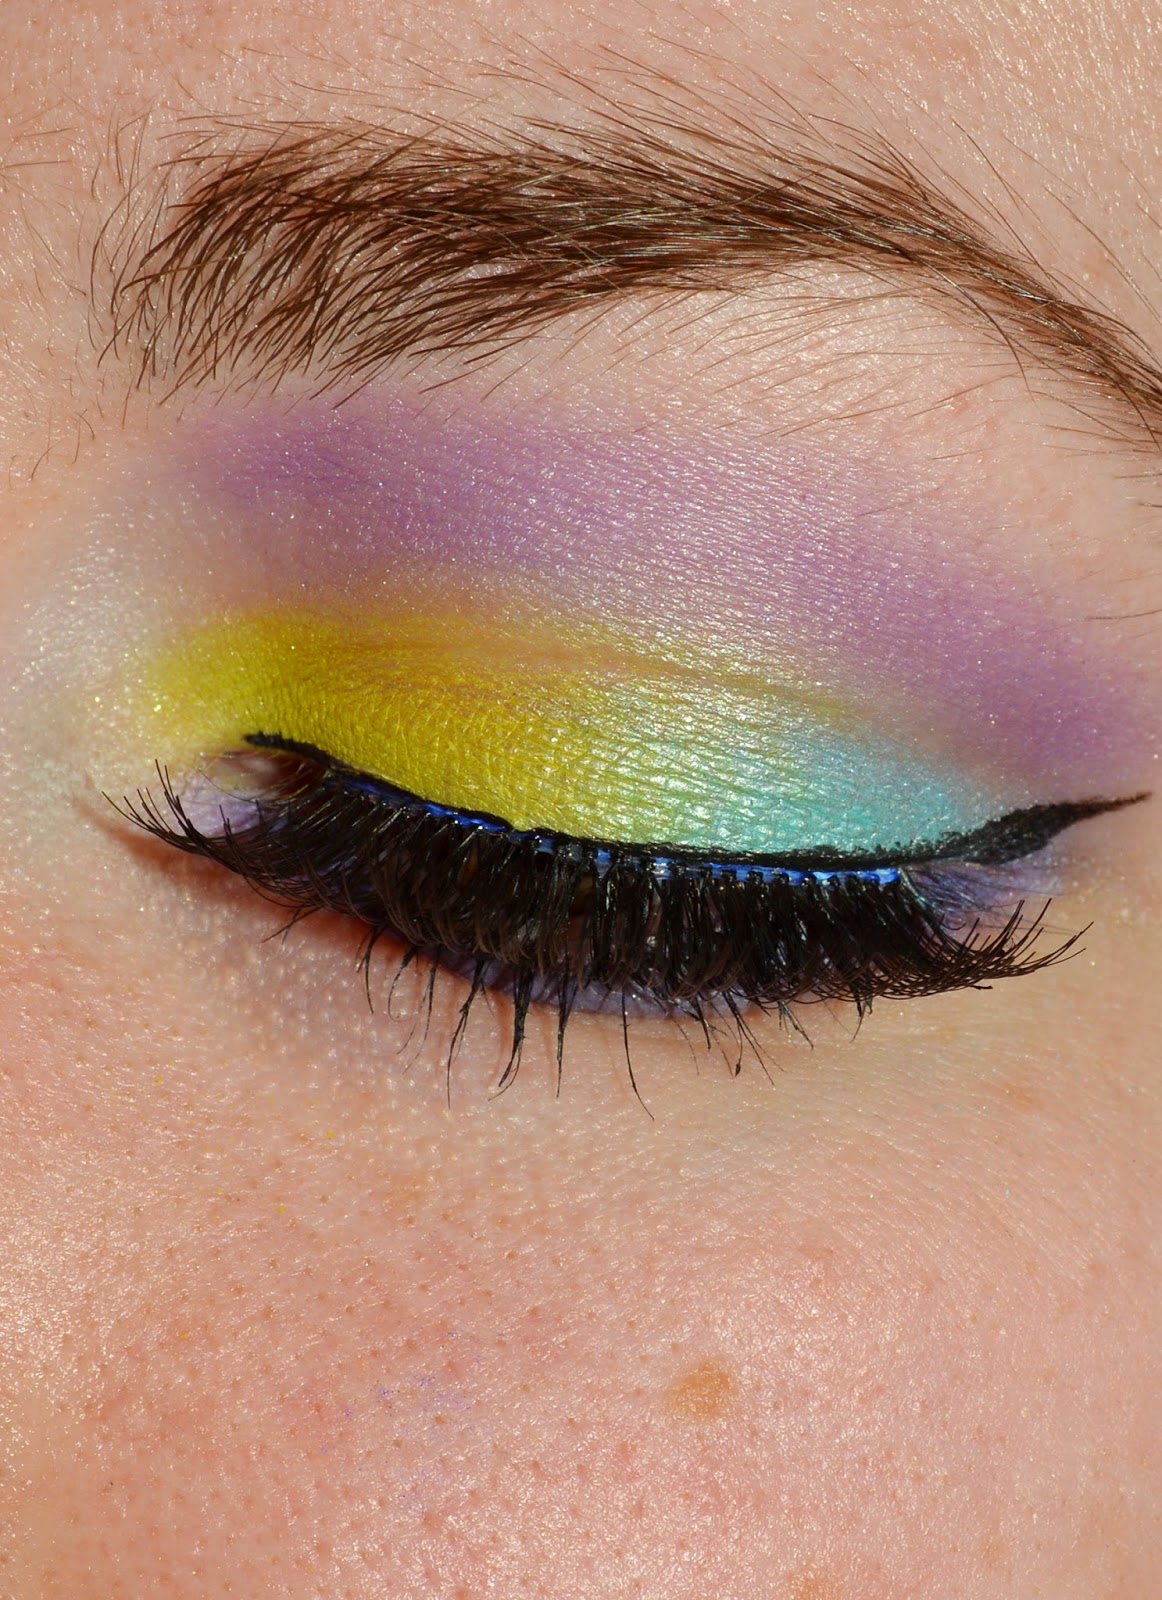
 Now for the lid shade. I used another Maybelline pigment, but this time I used Barely Brazen, which is a nude shimmer. When working with loose shadows, I prefer a stiffer brush. For a more foiled look, I will either spritz my brush with MAC Fix+, or I will dip my brush into contact solution before dipping into the pigment:
 The key is to PACK the pigment onto the lid. Do not sweep. This will cause fallout and your shadow will not last as long!
Next, I applied my gel eyeliner with the RealTechniques Fine Liner brush:
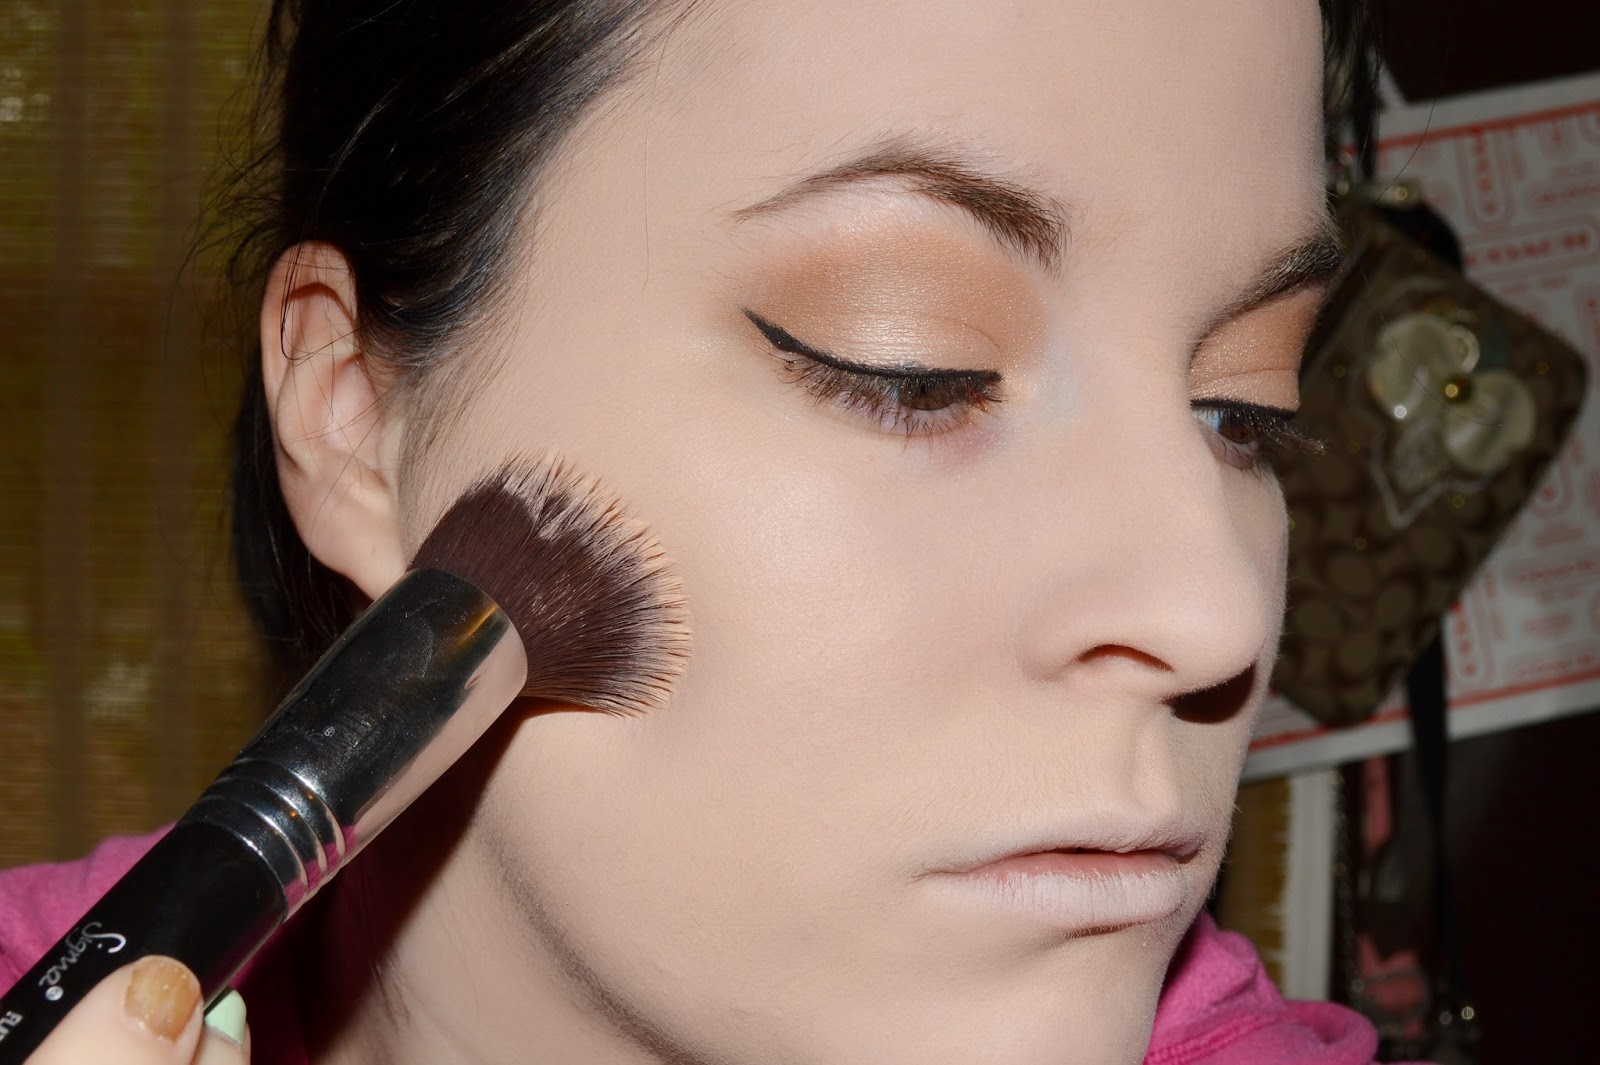
 My routine was a little out of the ordinary on this day, so I skipped mascara for the moment and went on to foundation. I am using the Rimmel Stay Matte Mouse Foundation in Light Ivory and the Sigma F80 Flat Top Kabuki Brush:

 This foundation is FULL FULL FULL coverage. Dry skin gals, you will not like this foundation. This is meant for the oily ladies that need shine control and a matte finish:

 Next, I applied my MAC Pro Longwear Concealer in NC15 (it's a tad yellow for me, but it works):
 Then I set everything with powder:
Now it's time for mascara. I'm using an oldie but a goodie, the Maybelline The Falsies mascara:
 Then I applied NYX Blush in Mauve for some subtle color:

 Then I filled in my brows. Be sure to read my previous blog post about how I fill them in!
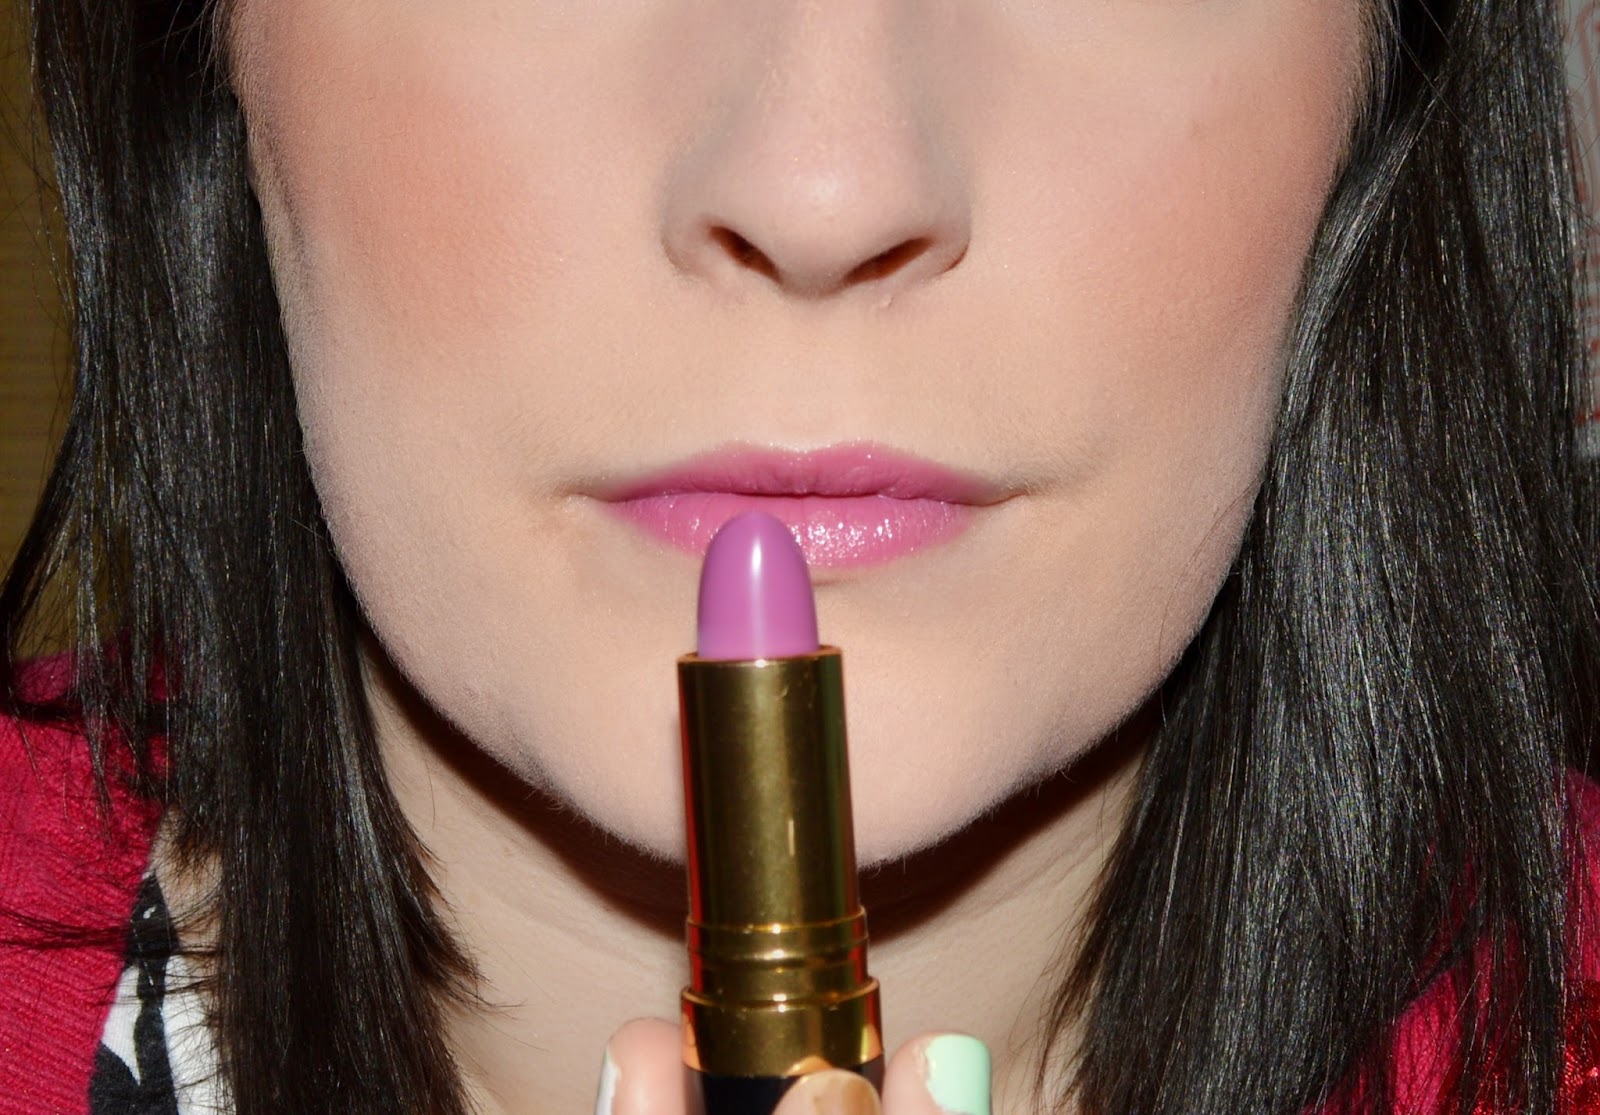
 For the lips, I chose Revlon lipstick in Berry Haute. It is creamy and sheer and I love it!
For lashes, I went with the Ardell Natural Wispies.
And VOILA! All done!


 I really enjoyed the way that the pigments went on and how long they lasted.

And I know that you don't get to see my hair in every post, so I figured I would get all dolled up for you!


I hope you enjoyed this pictorial! Want to see more like this? Sound off in the comments!

I HAVE A NEW INSTAGRAM! AND IT'S PUBLIC! Go follow @angelacollinsbeauty !!!


xoxo, Ang

Wednesday, May 7, 2014

How I Fill in my Brows

Hello dollfaces!

Today I decided to "fill you in" on how I fill in my eyebrows.

Let's get started!
Here are my brows before:

I use the NYX Eyebrow Cake Powder in Dark Brown (Available here!) and an angled brush

 What I do is dip the brush into the powder, then start at the front of my brow. Then, in short strokes, move from the front of the brow to the tail end.
Less is more when it comes to filling in the brows. There is such a thing as overdoing it with the eyebrows, and let me tell you, it's not pretty haha:

 There really is no rhyme or reason to the way I fill them in, but I do fill them in after I have done my foundation and powder.

And voila! All done!

I love my brows the way they are, but sometimes they just need to be filled in. If you are getting your pictures taken, I highly recommend filling your brows in because they are the FIRST thing to go in photographs. The general rule of thumb is to go about 1 shade darker than your hair color. If you try to match your hair color, it ends up looking too matchy-matchy, especially if you are platinum blonde.

Want to see more pictorials like this? Sound of in the comments!

I have a second blog. Go check it out! (Angela Collins Imagery)

Follow me on Instagram @angelamcollins

xoxo, Ang